This post will be my home for all things related to my Medieval Madness adventures in 2018 and 2019. It will include a running log of restoration & mods, repairs & more.
August 20, 2018
Lots of new pinball out there.. A steady stream of interesting-looking titles from Stern, the PPS Chicago Gaming remakes and others are the grease the move the wheels of collection turnover. A good time to buy pinball and sometimes a good opportunity to pick up classics that have been on the want-list for awhile.
I started the year with a pretty clear mindset in regards to the hobby and my intended acquisitions: Out With the New, in With Old. Coming off a disappointing ownership experience with JJP and having witnessed a friend having an even-worse ownership experience with a WOZ and battling Stern Spike Node-board failures on my Ghostbusters Pin, I decided it was time to take a break from modern pinball and pursue some 90's Bally and Williams classics.
Last year around this time it was Attack from Mars. This year, it is Medieval Madness!
Medieval Madness has been on my radar for a couple of years. But, my sleep number (the number of Pinball machines I can reasonably maintain at one time) is still 6. In order to buy Medieval Madness something had to find a new home. Both for space and because of the big hobby spend..

It all worked out that in one weekend Star Wars found a good home and the Medieval Madness transaction went through.
Archived photos from Pinside listing:
https://images.eyedyllic.com/Hobbies/Medieval-Madness-Pinside/n-3djLCC/
Shipping / Delivery
Medieval Madness was located in the Tampa area. I needed to get Star Wars to its new owner and Medieval Madness from Florida.
Plane ticket = $200
Rental truck from Tampa, with mileage = $500
Typical pinball mover dude = $275
STI - Not allowed on my premises anymore.
UShip - $800 avg quote
Roadie - $500, open pick up truck move with a tarp. No thanks.
RLCarriers - Retail $1600 on a pallet
Seller not willing to take it to Fastenal ($175)

This looks like a job for..
An arcade mover dude! I posted to the book-of-faces and the village and the four corners of the tubes that make up the internet. Bob Cunningham wasn't going to be in the area. Greywolf not coming down the panhandle anytime soon. Pinballs on the Move, no answer...
Mover Dude
In the end, this isn't a complaint nor a recommendation but at this time I don't really want to publicly influence some guys' livelihood. I might use him again in the future. Spoiler alert: The game made it and I'm happy.. There.. were .. bumps along the way, though. So, for now and for purposes of this post, we'll call him Mover Dude.
Eventually, I found said dude and after reviewing some of his history and talking to him he agreed that he would be able to work my pick up in for $320. I pulled the proverbial trigger. After a few promising SMS and Facebook Messenger exchanges I had a decent level of confidence that I the right guy. Sort of like w/ Bob, you can follow the guy's check-ins on Facebook and get a general idea of his route and location.
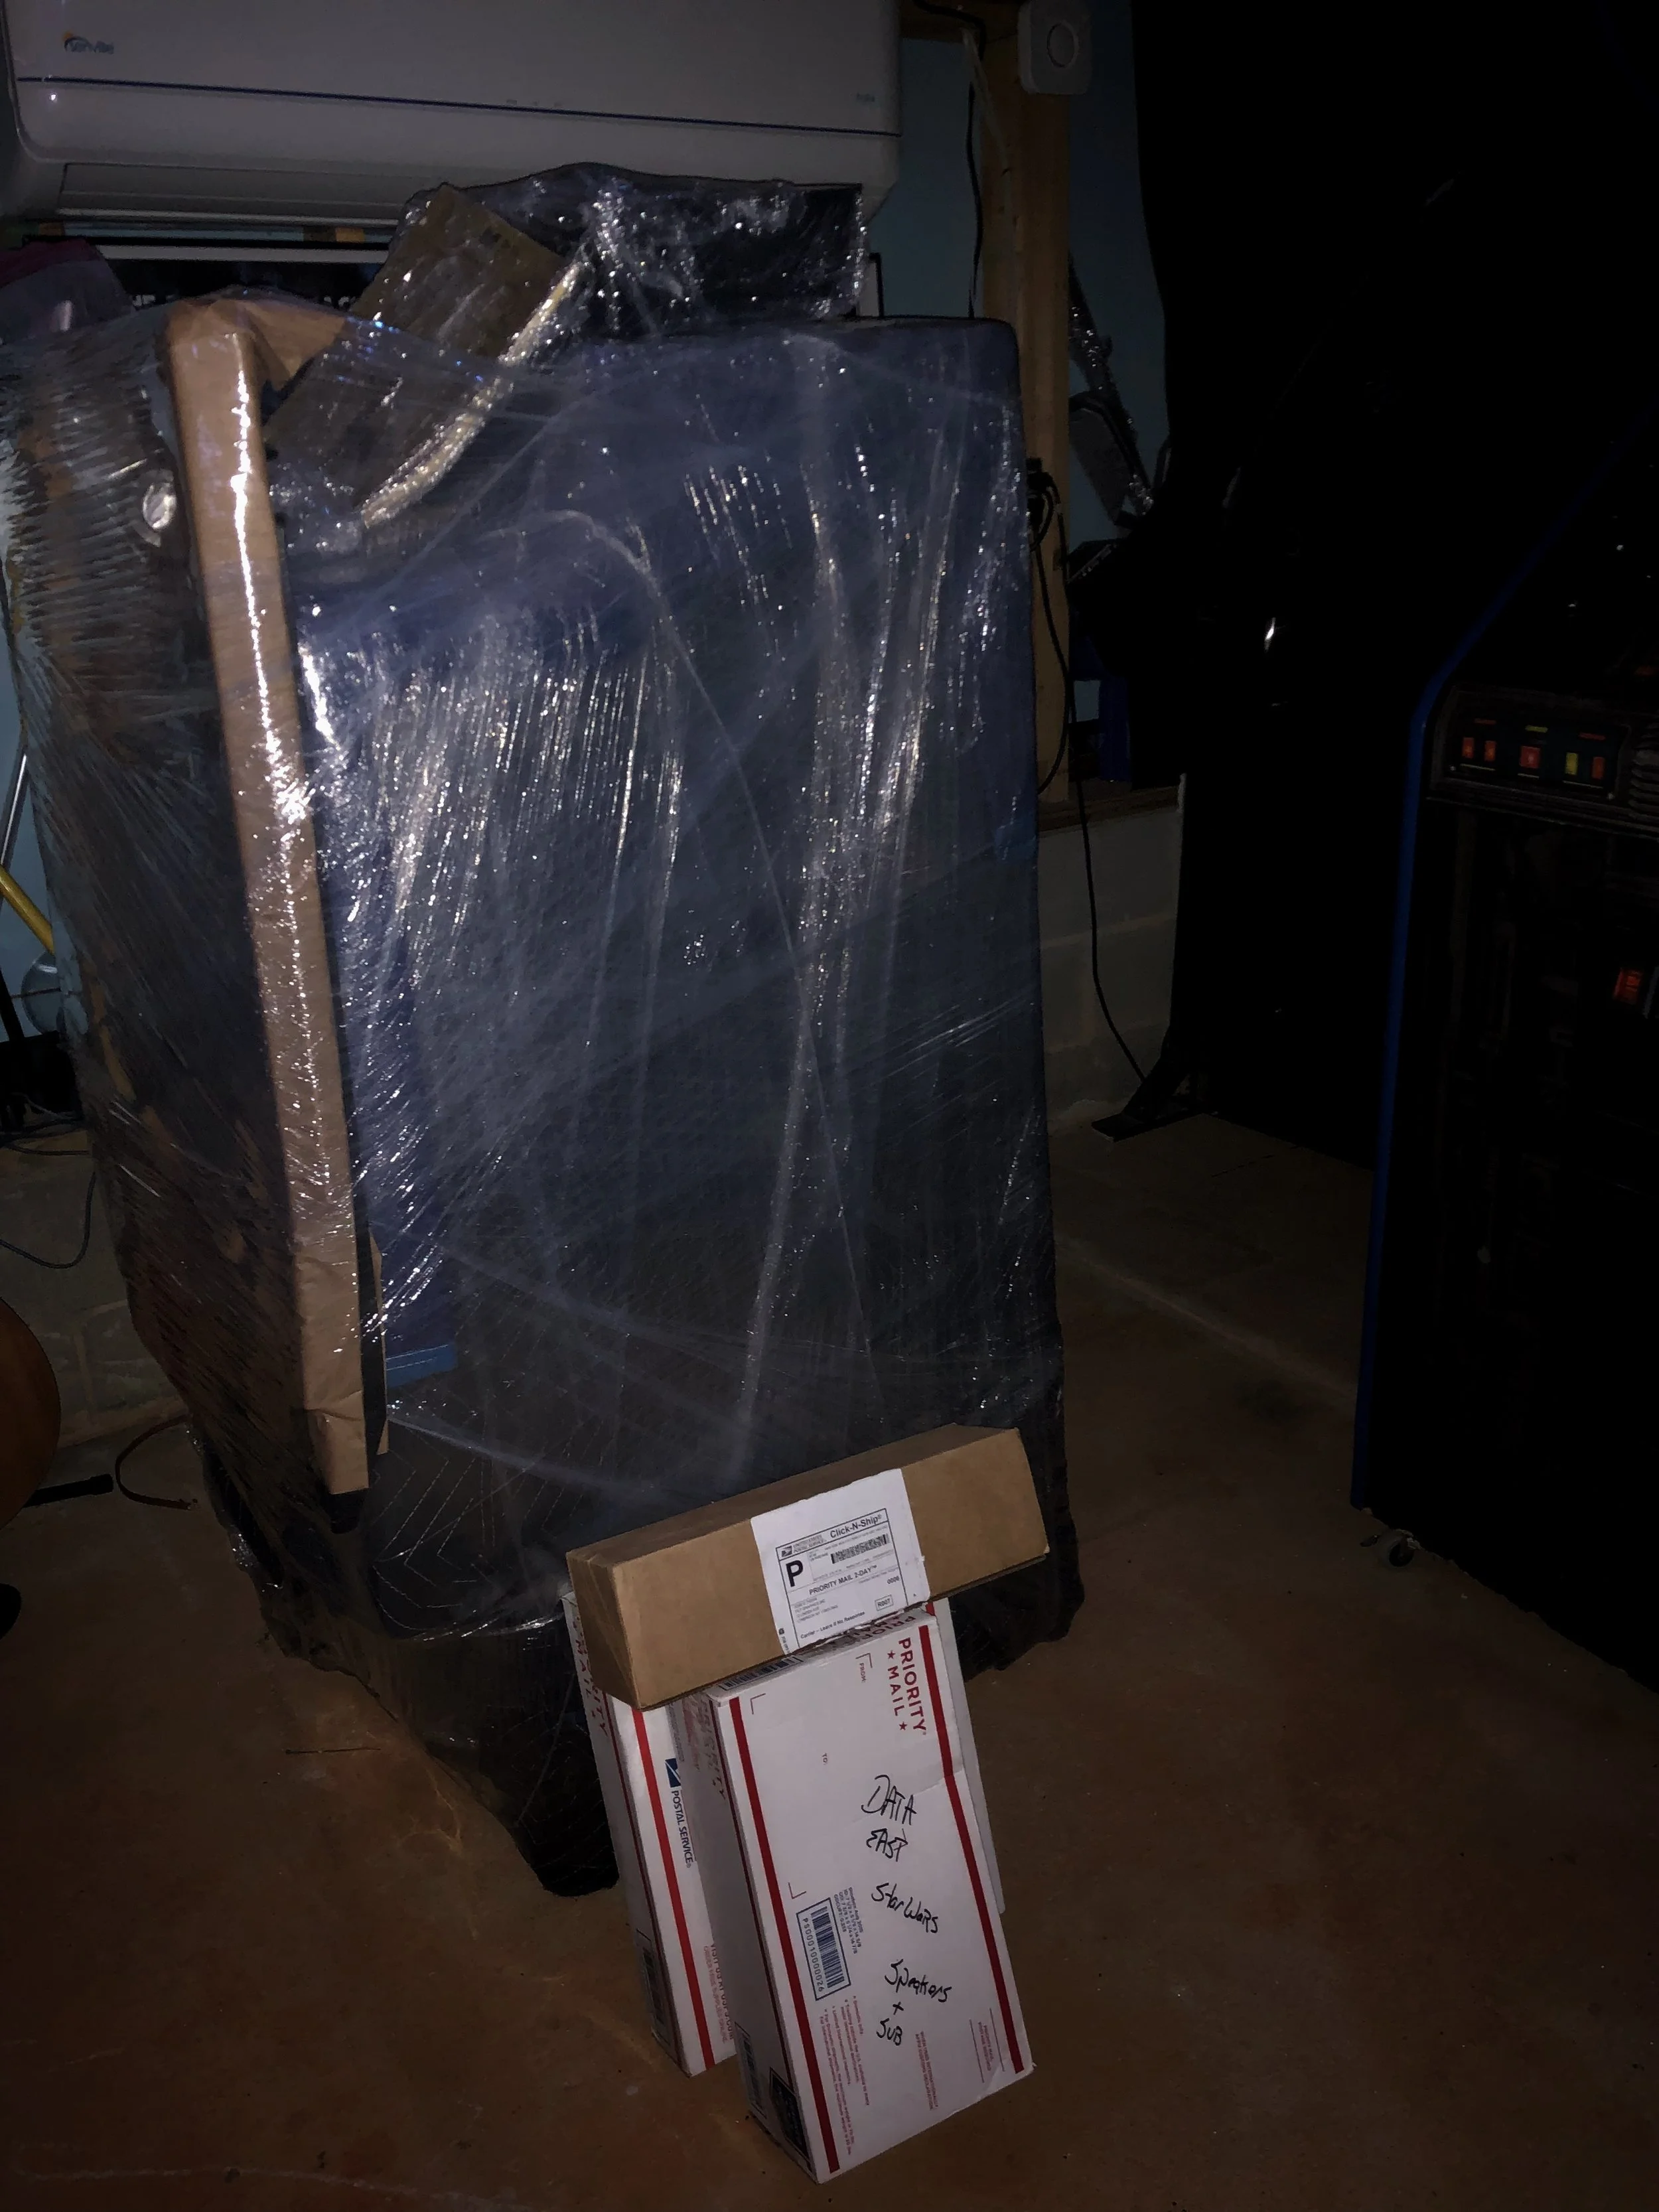
Around dinner-time one evening, I received a missed call and an iMessage photo of a black-painted stick of wood from the seller. I knew the delivery dude was in Tampa but I didn't know that the move was in progress. The photo, below - had no caption and set my spidey senses tingling.


Hours later, I get this story, paraphrased, from the seller:
He broke off a board from the back of the pinball machine while going down my stoop. He went down the wrong direction and turned and I just heard this sick-grinding noise and a snap. I don't know if it damaged the art or not.
In fairness. I don't know what happened. Because I'm not there. But...... crap!
Whiskey. Tango. Foxtrot.

Honestly, at this point I'm stressing the move so I send over this message to the delivery dude and try to get some additional details from his perspective.
On a personal note, at this point in the evening my ADD med has begun to wear off and I'm aware that I'm not always in the best of moods while that happens. It took extra effort to come across more calmly about the situation than I was actually feeling.. Typically, for that 30 minute-to-1hr of the evening my inner Steve Jobs is most near the surface and ready to burst out when provoked. I think.. I succeeded in not freaking out..
and... at least I know that I sometimes have unreasonable Griswold-like expectations and standards and that people aren't mind readers and... yada yada..
The response that I received were the following photos from the move. Not bad! Started to freak out less. Though, there was also Whiskey involved, so maybe that helped.


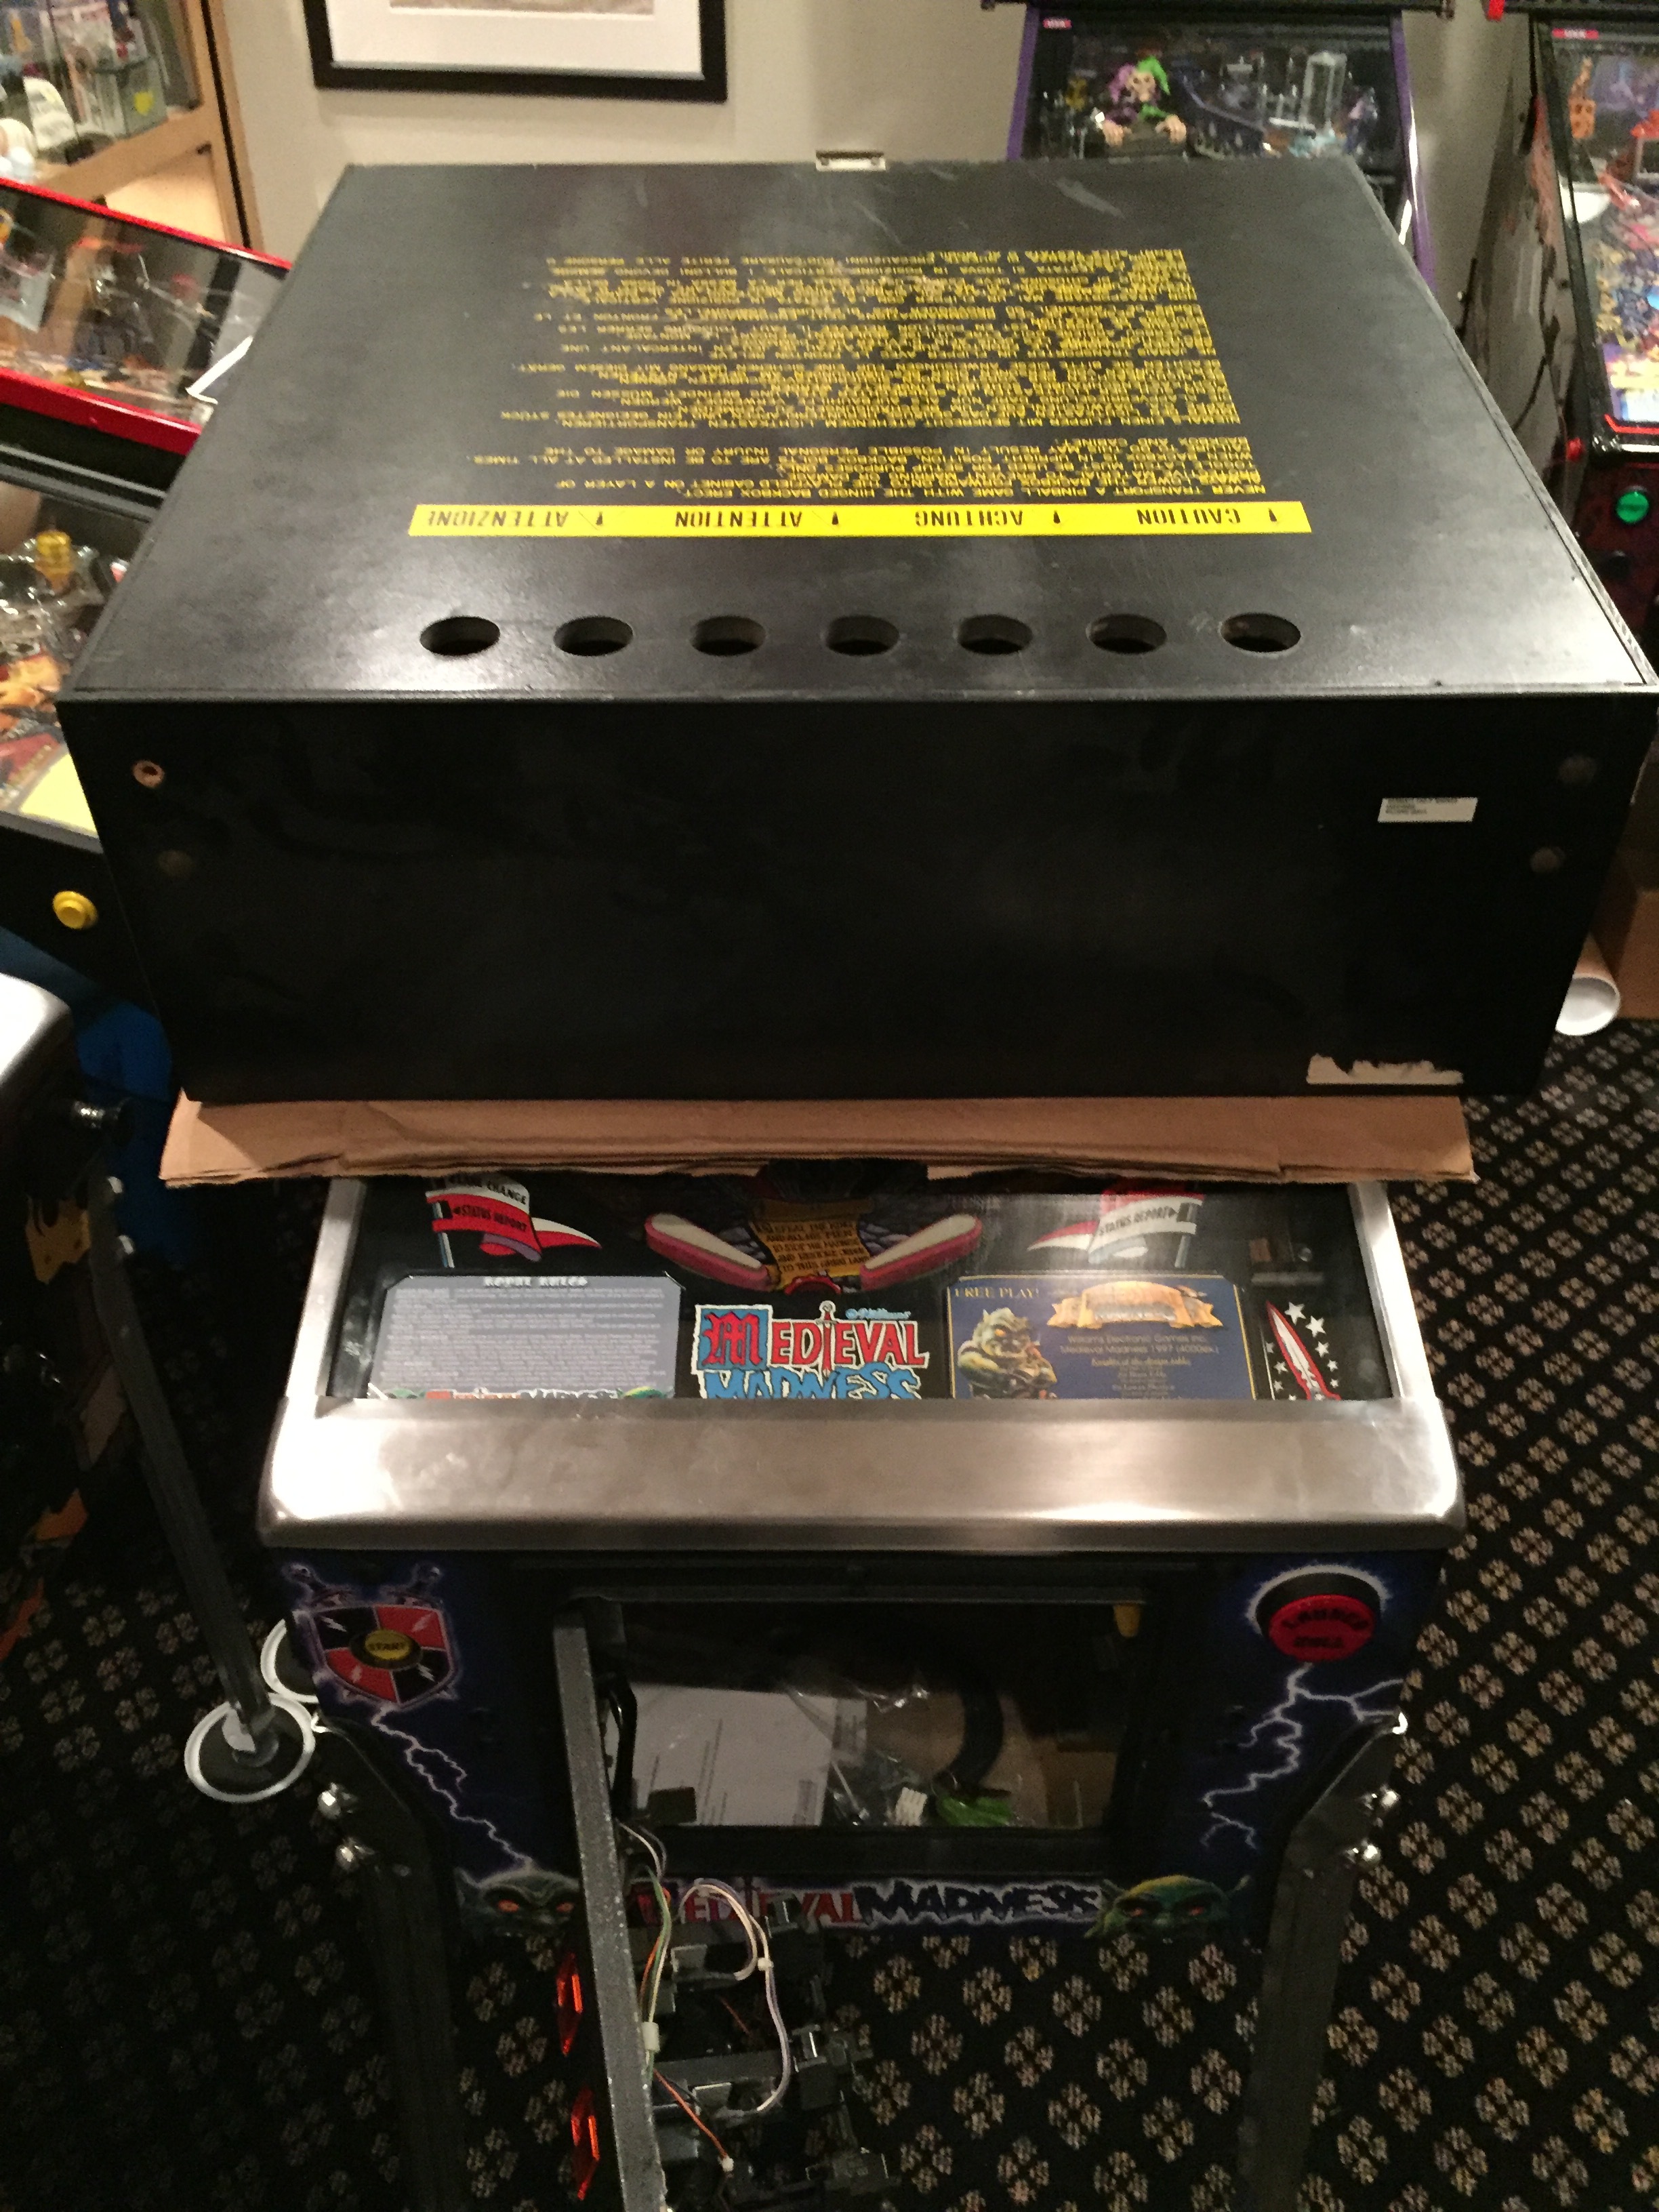
General feedback here is that it's cool that he took the time to pull the game out and play it and noted functional condition of the game (draw bridge works, gate opens, etc). He also paid special attention to note the flaws of the game, like the gash from the lockbar on the front of the cab that the seller had communicated and I wasn't too worried about. That's cool and I can appreciate that.
I'm personally not a big fan of the head->cardboard->rails sandwich packing method. I like to use a double or triple folded moving blanket between the head and side rails but that's just me. Not too thick to generate pressure on the hinges but thick enough to provide a little give on that plane of potential impact. If you ever watch high-speed camera, slow-motion ripples of impact force transferring through wooden objects, the idea is to create an opportunity for the impact forces to dissipate. Again, I didn't micro-manage this with mover dude and he's not expected to be a mind reader - just commentary. :)
The fact that mover dude took steps to protect the rail->head contact points at all is bonus and shows experience IMO.
I did drop-ship from Amazon blankets and plastic wrap for the move but Amazon Prime 1-Day turned into Amazon Prime 3-4 Day and missed the window.

I'm also not a huge fan of stretch wrap touching a bare cabinet. Stretch wrap can stretch and pulls with surprising force with friction against the art. When I saw these pictures, no blankets involved, my worry ramped back up a tad. Coupled with the photos of the broken skid, my imagination ran away and I partially expected to receive a large garbage bag with approximately $7k in castle-themed Williams parts and troll head bash toys amongst shards of wood and millions of crystalline tempered glass shards.
My fears were calmed three days later when the machine arrived it was wrapped in an additional layer of (2) moving blankets and another layer of plastic wrap. It was securely strapped inside his truck and made it without any (additional?) damage.
Also, bonus points that he brought the legs (last move with a different moving dude was missing legs) and the skid and all accessories. ++ For mover dude.


The back-right of the cabinet has a significant scrape and a separation in the ply of the head support board. That scrape is on the same side of the cabinet as the missing skid. From the listing photos, I don't have any way of knowing for sure if this was a result of this move or something else. Fortunately all easy fixes and didn't mess up the artwork. At the end of the day, the machine made it to me safely in all of the ways that really matter. Any damage that is there either from previous ownership or this move - I will easily have fixed and touched up by the weekend.
All things considered.. Mover Dude was a success. The Seller was flexible and described the game quite well. (Probably under-sold the condition.) The seller really had me worried for nothing.
Survey of Initial Condition
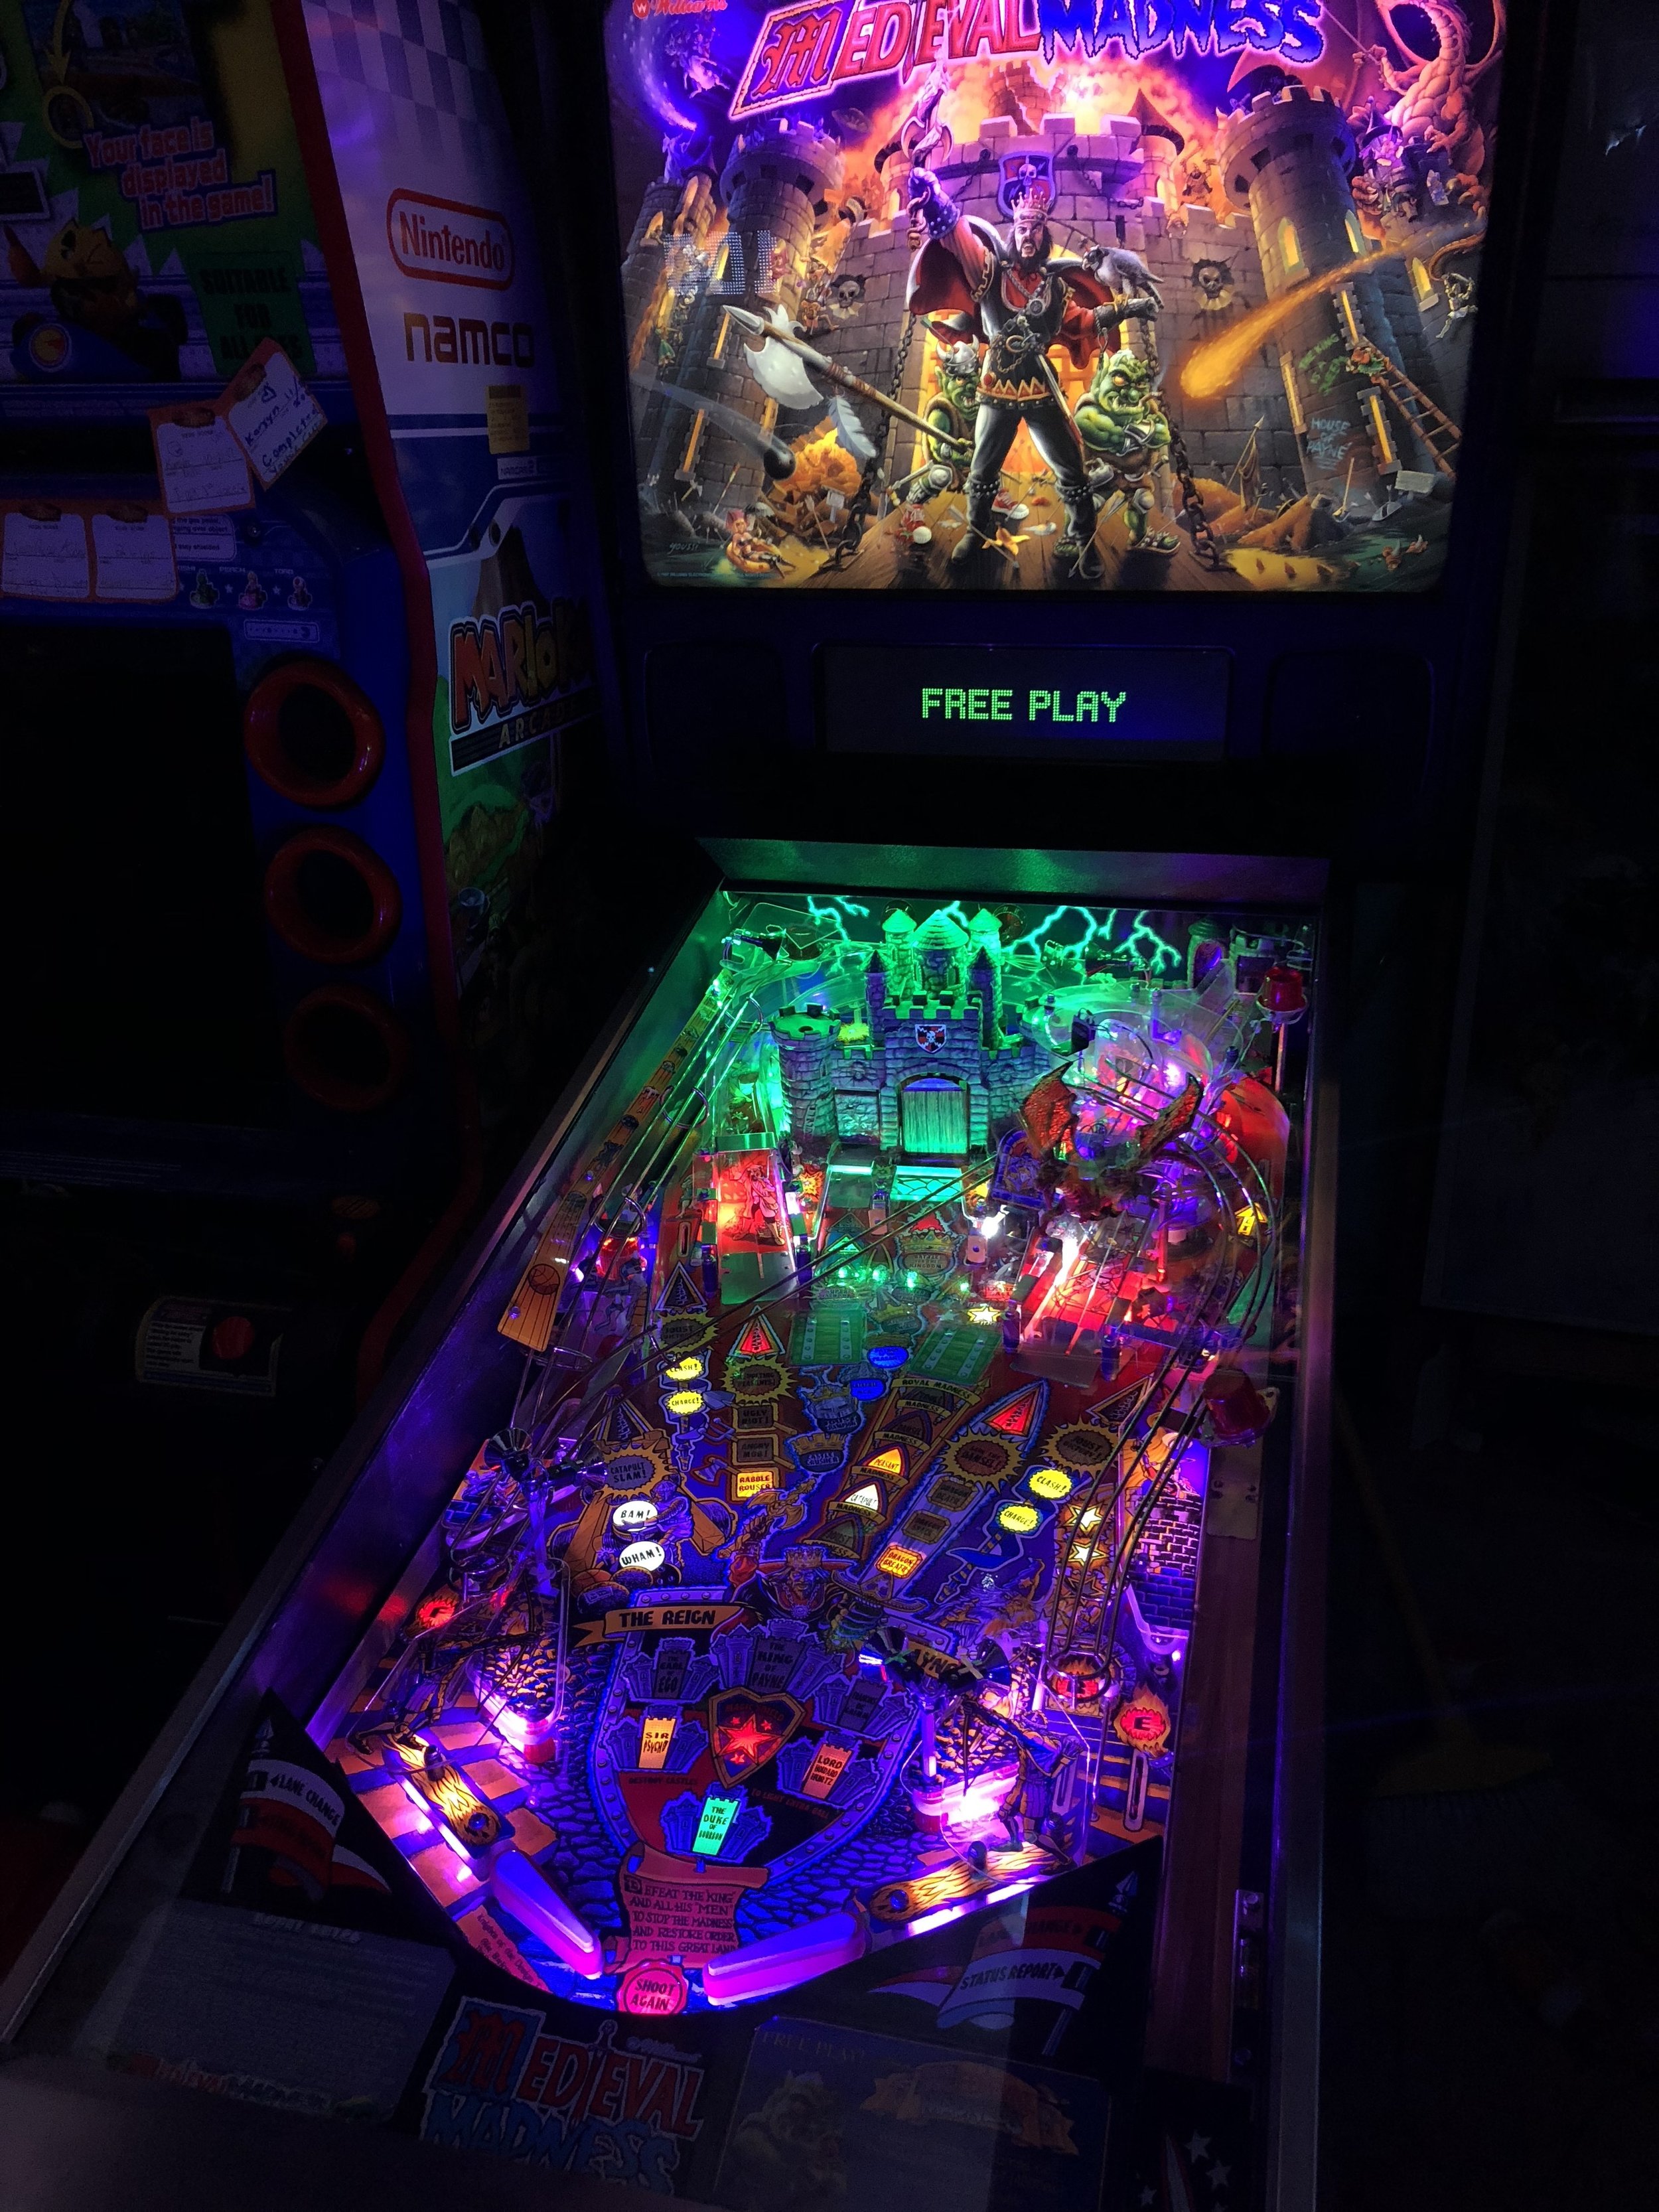
Overall, I'm really pleased with the condition of the game.
ColorDMD included, LED OCD Controllers included, all things I typically do to games and reduce my shopping list burden on the receiving side.
The owner said it was a pinballbulbs.com kit and I found some of the color choices to be a bit much for my taste. A little too much UV and too much green on the castle. Green in the mote, full green strip under by the backboard support, green spots on the castle.


The Pinball Pro speaker upgrade was a nice touch, the sub almost feels like a shaker motor at times. Very nice touch and surprisingly good sound for a non-pinsound-based system.
Who Does Number Two Work For?
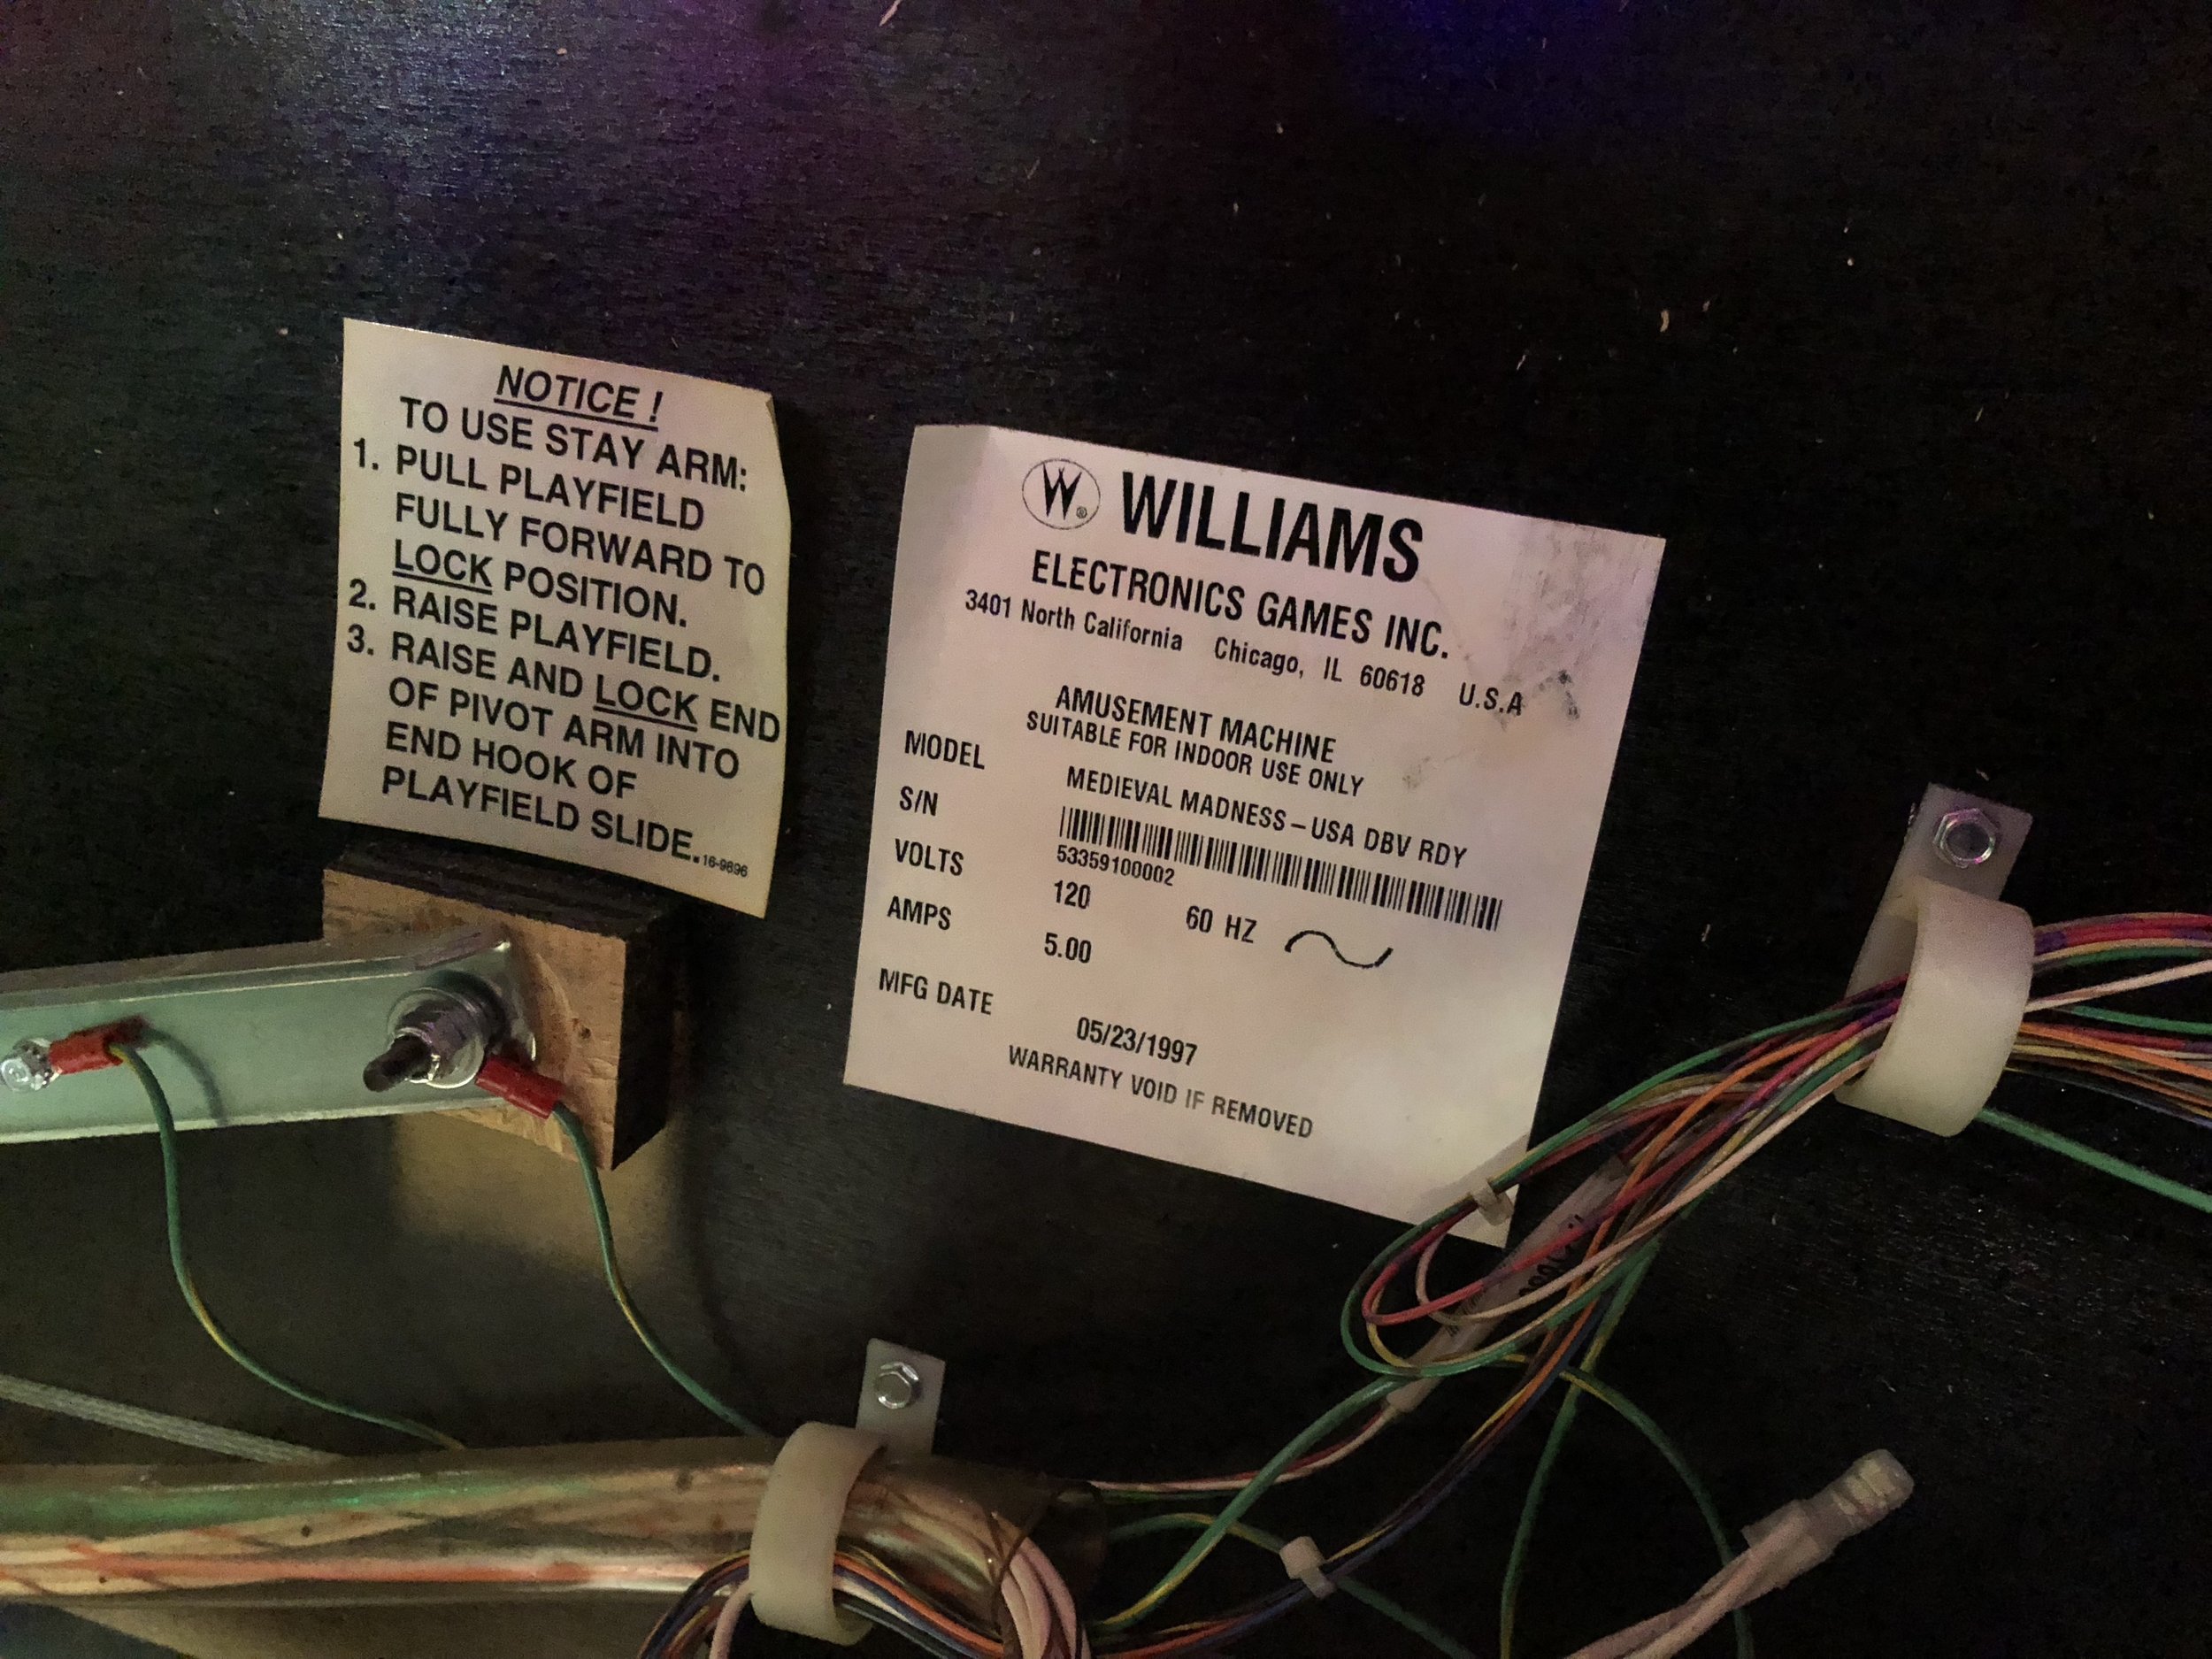
The Serial Number on the game is 53359100002. Production date 5/23/1997. According to IPDB, 4016 units were built with a production dated as June, 1997. Prototypes ran in March. Serial number 00002 with a 5/23/1997 mfg date. That makes this the second production Medieval Madness off of the line. (Probably) Inspected by.. you guessed it..
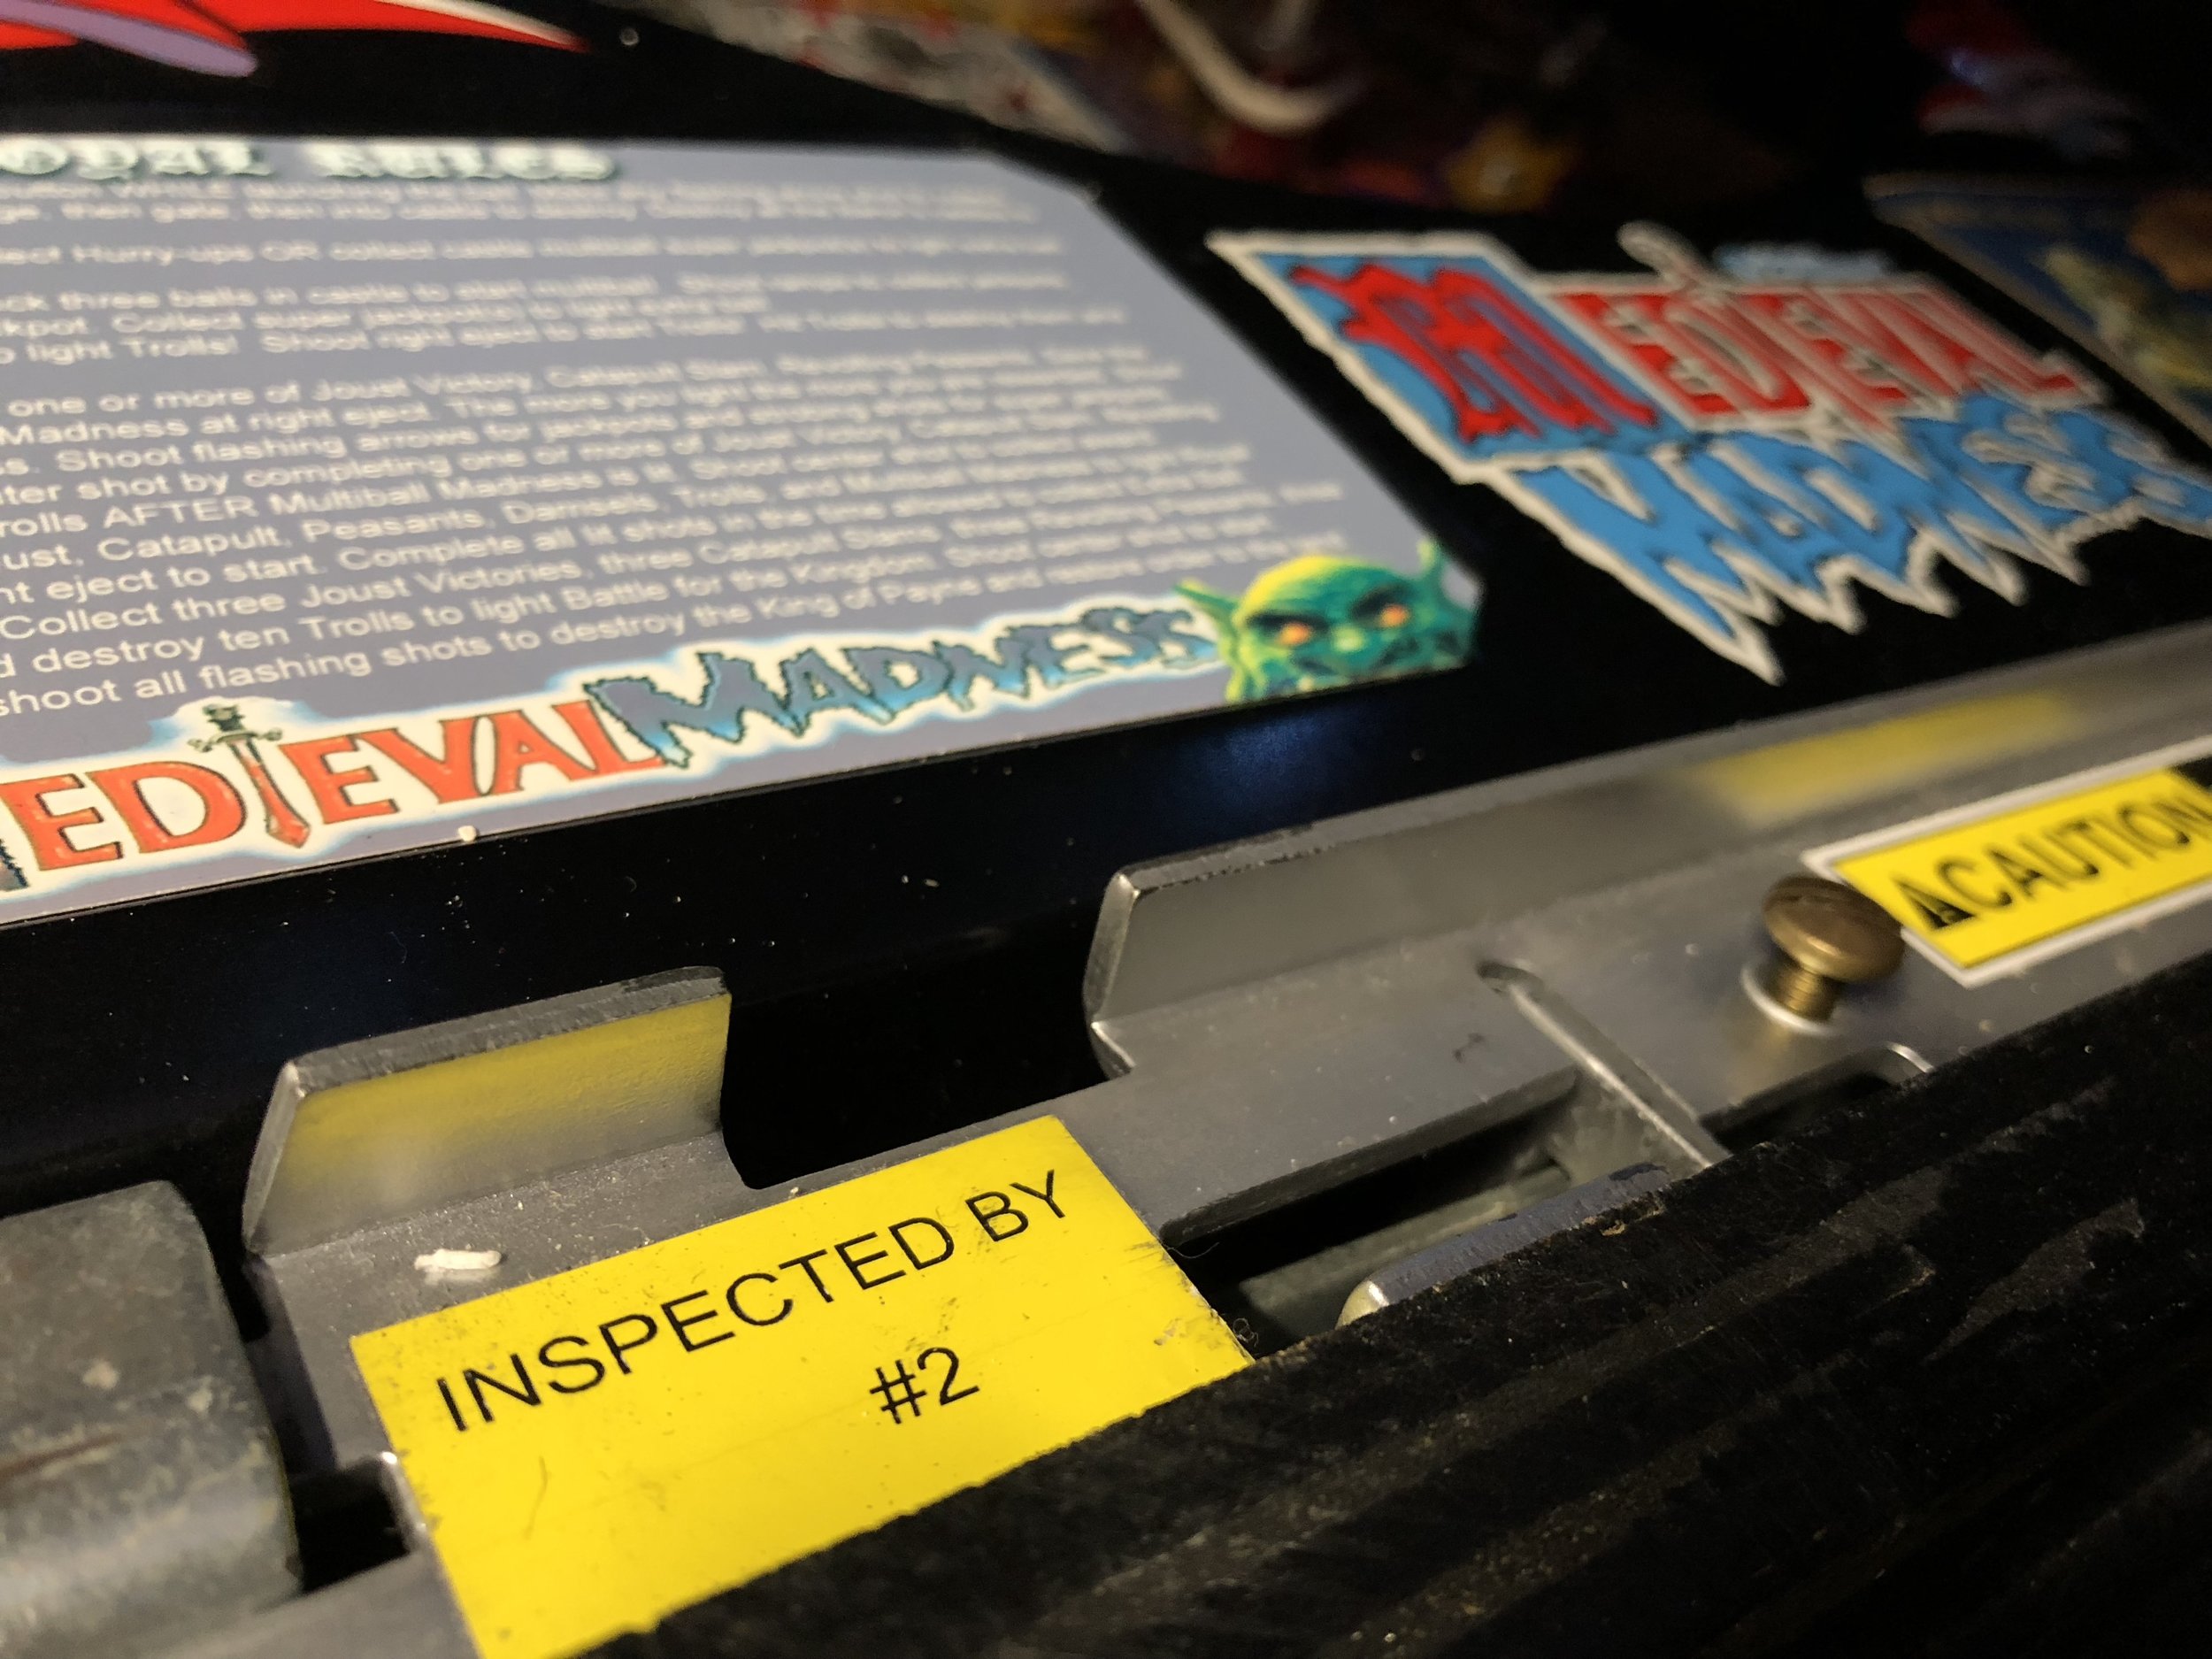
Number 2
Dialing it in

I added some warm tone LEDs back into the mix to reduce the UV saturation a bit and abandoned the green strip on the castle. I put in RGB changing LEDs on the castle spots and cleaned and waxed the playfield. Ordered what I needed from Titan to bring the rubber situation into my liking.
The scoop kick out beneath the left ramp (ejects into the orbit) has a tendency to shoot the ball into drain instead of returning to the left flipper. The joust / orbit however would return directly to the left flipper. The scoop appears to be kicking it out too hard and rolling down the inside of the joust orbit instead of against the rail itself.
After adjusting the scoop kickout tension bracket down a few mm, the gameplay feels a good bit more balanced.
Well, that's it for now. My last pinball purchase for awhile. I'll do some arcade-y things next, this fall and winter. Many incomplete projects over in that side of the hobby for me. :)
Addendum 7/7/2019
MIrror blade time!

PinballSideMirrors.com always seemed to me to be comparable quality with PDI Mirror Blades but at a slightly better price. Lately though Pinball Side Mirrors site hasn’t been rendering fully in most of my browsing attempts. As it turns out, Cointaker now owns PinballSideMirrors and they’ve rolled those products into their main catalog: https://cointaker.com/t/side-mirrow

You ever notice how immediately after upgrading a game, they have a tendency to set you up for a good game or two? As if to say “thanks!” it tee’d me up with an early Trolls! that led into a fully stacked multi-ball madness.